Use APKPure App
Get Nail Art Step By Step Design old version APK for Android
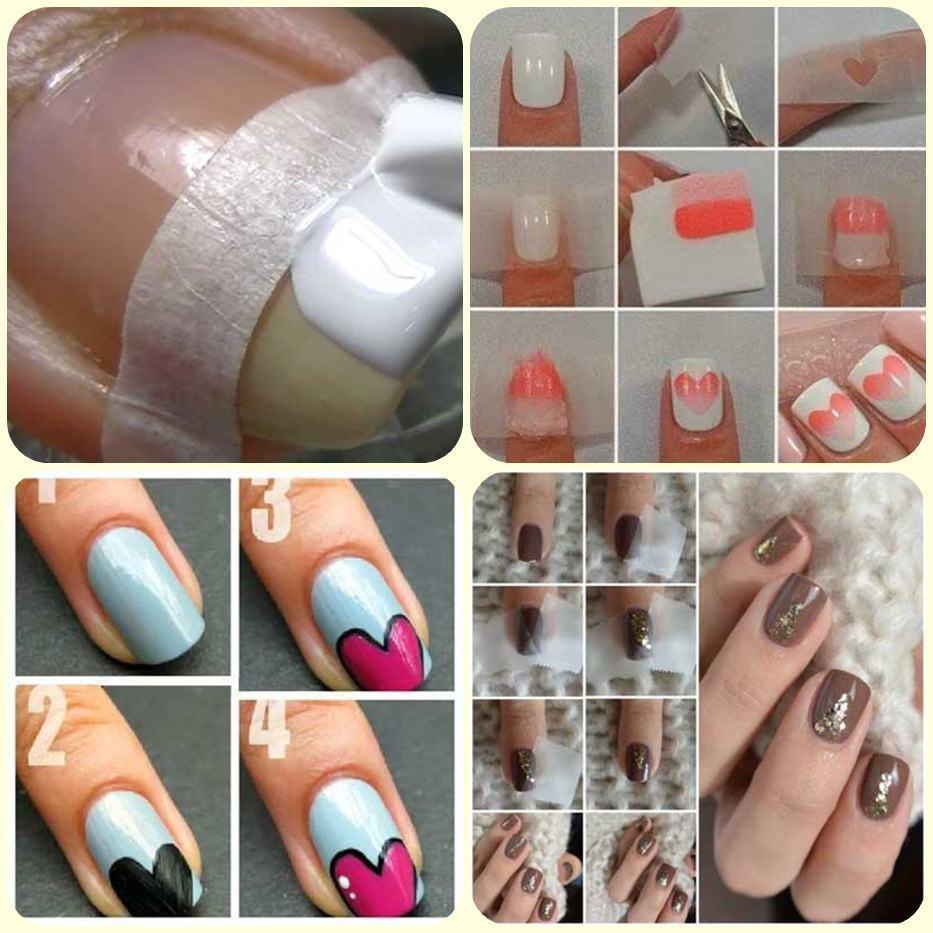
The popular nail manicure art with tutorial step by step for beginner
Do you want to learn how to spice up the look of your nails, beyond the simple nail polish? Nail art tutorial can add stunning flair to how your nail manicures look and provide a beautiful way to complement your outfit for a special event.
While highly detailed and complex nail manicure art has to be done by a professionals, there are a few simple nail art designs and techniques which you can apply to your own nails or those of a friend, at home.
Base Coast - Give your nail polish design a good base coat with the colour determined by the look and design you are planning. A neutral varnish such as clear, white, light beige or pale pink, can be used as a universal base. You can apply two or three base coat colors to different parts of the nail manicure to suit the design and speed up the art work. Apply two coats as it reinforces the art and provides a better finish. Make certain your "canvas" is tidy and has an even surface and is completely dry before proceeding.
Art Layer - Nail art step by step design takes time and practice to develop your own style. Start with simple things like curved lines, stripes and spots etc. A good tip is to use a minimal amount of paint on the brush and don't overload it. To steady your hand try resting your arm on a table or some other object. Take your time and do not rush things. If your brush develops globs of paint or becomes overloaded, wipe it off as too much paint can be a disaster especially for fine work. Try to keep your nail art design simple and apply all of one colour at a given time. There are many ways to be for creative using images or abstract designs. But don't make the mistake of making the images too "busy" or complex. You will learn that simple concepts are often the most attractive especially in such a small canvas.
Top Protective coat - Once all your nail art painting is dry, apply a protective coat over it a layer of clear acrylic. You will have to reapply the protective outer layer every two or three days to defend your DIY nail art and keep it looking shiny. Also you should apply cuticle oil every day. Protect your nail art design and avoid risky activities. Always wear gloves when gardening or other work.
Last updated on Aug 13, 2016
Minor bug fixes and improvements. Install or update to the newest version to check it out!
Latest Version
![]() 1.0
1.0
Uploaded by
Dali Dali
Requires Android
Android 2.3.2+
Category
Report


Discover what you want easier, faster and safer.

Nail Art Step By Step Design
1.0 by Rebillionest
Aug 13, 2016